Get the best guidelines to make the perfect craft video with an online video maker, and follow the instructions to help your viewers with the ideal techniques.
In this 21st century, everything is taking a virtual turn. Be it learning, working. You name it, and it has a virtual platform. It was making crafts that have always been a fun leisure time for many. Craft making is good for mind relaxation, and it also tends to bring out the creative side of an individual.
Creating a professional-looking video does not require investments behind expensive equipment. Instead, giving the few key details extra attention will help make a good video and reach out to the audience.
Creating craft videos can be fun but requires a few essential types of equipment to make the video turn out to be perfect. Here is a guide that will come in handy to make craft videos.

Tools and equipment required
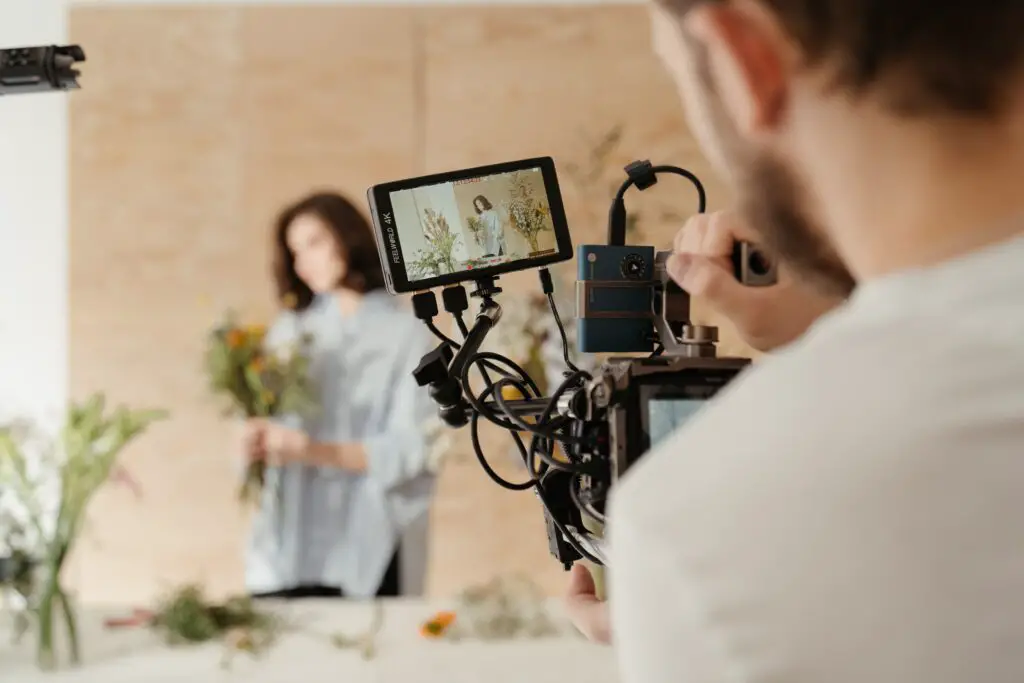
- Camera and recordings
The essential equipment to make a video is a camera. Different types of cameras give different video qualities. If you are new at creating craft videos, you should try filming with the existing cameras or camcorders before investing in something expensive that has High Definition (HD). The key to making a good craft video is getting to know your camera and your recording skills. A great video can be created even with an inexpensive camera. Practice your filming skills and then go for a camera with High Definition. Try focusing on the materials required with the zooming effect and make the craft-making procedure a detailed one. Play with your filming skills and the camera to turn the video into something extraordinary. You can try using a camcorder and have a look at its features here.
- Editing tool
Breaking the video into several shots is a good option because it gives a chance to make close-ups and scan photos so that the knowledge of the video in the making gets imparted to the viewers. The appropriate video editing software will give the finishing touches that the crafting video needs, including the video title, subtitles, transitions, and audio, and will erase the unnecessary clips. Craft videos can be edited on an online video editor to get that perfect finish with an extensive range of video templates and an easy-to-use editor to customize the templates. There are an abundance of online video editors to choose from these days, which make online editing fast, and even fun.
- Lights
A good video depends on good lighting. If the lighting is not correct, then it can distract the viewers. If the lighting is not enough, it can confuse viewers with the products and equipment used for making the craft video. Natural lighting works the best with such DIY videos. It gives a clear view of the things used, and the procedure followed. Avoid keeping anything shiny and glassy. The reflection will have a destructive impact on the lighting of the video.
- Microphone and audio checks
These are the third most essential pieces of equipment needed for a good crafting video. A proper introduction is necessary to keep the viewers engaged in the crafting video. Some cameras have a built-in microphone, but the sound quality might not be as good as expected. It is always a better option to invest in a separate microphone to get clarity in sound effects. About voice-overs, it requires a particular audio recording application. This recording should be added once you start to edit your videos. Try using the online video maker to get the best editing options for the videos.
- The staging area
It is vital to have an appropriate staging area because what is shown on the screen is portrayed to the viewers. Try taking test shots to ensure the staging area looks perfect and displays all kinds of details necessary for making crafts. Regarding mixing colors, the procedure needs to be shown clearly with the complex amalgamation of colors. Imagine how the video should look on-screen, and then make the respective arrangements to settle the products and materials and keep them for the craft video.
How to make craft videos: tips and guidelines
- How to set up your camera: If right-handed, set the camera on the left side, beside the seating arrangement, and vice-versa. If the room is not well-lit, use a desk lamp and place that on the left side to avoid any shadows. To film from right above, it’s best to use DIY options like balancing on boxes or books. It’s no use buying a monopod right at the beginning. Set your hands to film videos and then invest in a monopod for top views. Once your camera is set, do not try to move the camera. Please keep it on a tripod or a steady surface for better recording.
- Avoiding echo and unnecessary sound: The best option is to film the video in a quiet place to reduce echo and background noise. While audio recording, cover yourself and the recording device with a towel so that the sounds can’t bounce off the walls and come back to the microphone, causing an echo.
- Video structure: The video structure should include an introduction with short video clips or photos of the finished craft or artwork, a picture of the list of tools and supplies needed, and then the artwork process with captions followed by video clips from different angles of the finished piece. There should be an end-slide of the social media links and a reminder to channel subscription.
- Audio clarity and gestures: Speaking clearly while making the craft and the required supplies are necessary. Practice recording to know if your voice is loud enough. Act as if you are talking to the audience. Do not read from the script. Talk as if you are explaining the procedure of making a craft to a person who is right in front of you. Do not stare at the camera. Use little hand gestures and speak with more than monotone.
- Simple transitions: Avoid using animations like spinning, flipping, and rotating. The best kind of transition is fading or no transition at all. Excessive changes might distract the audience, and they might miss essential segments of the procedure of craft making.
- Time the shots: Keep your pictures longer than five seconds but less than 10 seconds to keep the audience engaged in your content—no zooming in or out in these time slots.
Conclusion
Recording craft videos can be a little difficult at times. Getting the perfect lighting, the right angle, the ideal background, and the correct number of shots can be confusing. However, if the above guidelines are thoroughly followed, it will be easy to complete the entire video by getting the best images with the perfect audio and voice-over.
Thank you for your sharing. I am worried that I lack creative ideas. It is your article that makes me full of hope. Thank you. But, I have a question, can you help me?
Your article helped me a lot, is there any more related content? Thanks!
Thanks for sharing. I read many of your blog posts, cool, your blog is very good.
I don’t think the title of your article matches the content lol. Just kidding, mainly because I had some doubts after reading the article.
I love how this blog gives a voice to important social and political issues It’s important to use your platform for good, and you do that flawlessly