… this post contains affiliate links. We receive a commission from all qualifying purchases. This helps us keep our website running and to create new and interesting content for YOU…
THANK YOU for VISITING!
You can find more of CREATIVE MOM’S art and diys on facebook, twitter or her Youtube Channel.
Thanks Diana from CREATIVE MOM for letting us feature your fun artwork!
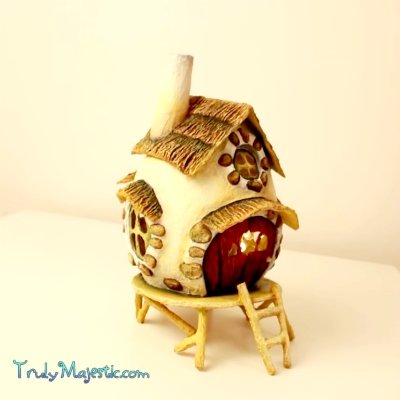
Let’s Make A Fairy House Night Light
For this cute fairy house project you’ll need:
- Cardboard for cutting and cardboard for making the paper clay (egg cartons work great for the clay)! I’m sure you have some laying around the house.
- A Balloon
- PVA Glue
- Cheap Blender (don’t use your expensive one).
- Watercolours (or acrylic paints)

This is a really easy fairy house tutorial is great for anyone needing a fun project and excellent to make with children as it doesn’t cost a fortune to make.
First off we need to make the paper clay. If you don’t want to make it you can always buy it as well. The bought paper clay has a smoother texture than the homemade version.
- Grab your balloon and keep it in a stable place while you spread paper clay evenly across the whole balloon.
- Once the balloon is dry you’ll need to cut out some cardboard for the roof, chimney, window overhangs and stones.
- Hot glue the cardboard where you would like it to be.
- Create the platform with rolled paper that has been hot glued together and painted.
- Cover the cardboard roof and overhangs with the paperclay.
- Once everything is dried cut out the windows.
- Use water colours to layer your paint and give it that magical feel.
The whole DIY to this fairy house is embedded at the top of this article.
If you’ve enjoyed this post, share it with a friend.
If you’ve tried it, send us a picture of your fairy house and we’ll show it off at the end of this post.
… this post contains affiliate links. We receive a commission from all qualifying purchases. This helps us keep our website running and to create new and interesting content for YOU…
THANK YOU for VISITING!
